How to add a Deal?
How to Add a Deal in CreamSoda
Adding a new Deal in CreamSoda is straightforward, and there are multiple ways to get it done, depending on where you are in the CRM. Here’s how:
Different Ways to Add a Deal
You can start a new Deal from several areas within CreamSoda:
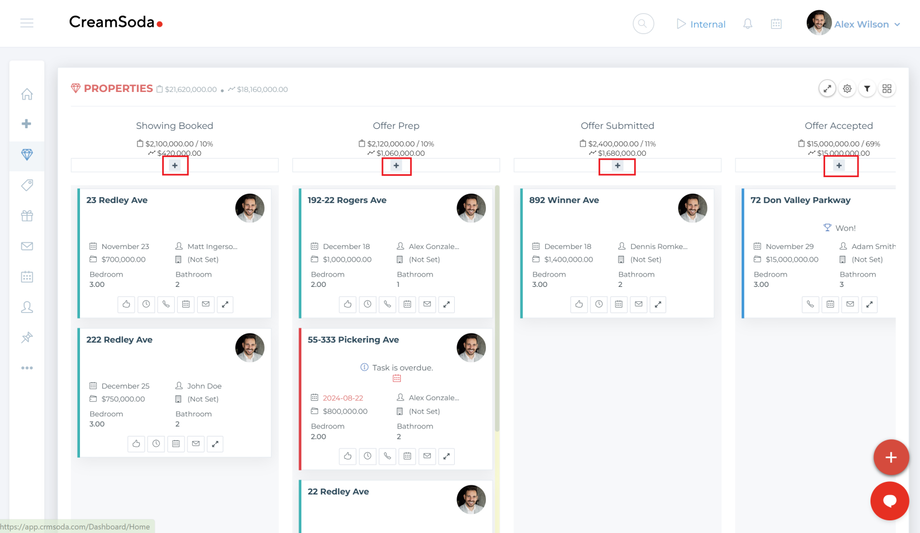
Deal Board: Simply click “+” at the top of a sales stage
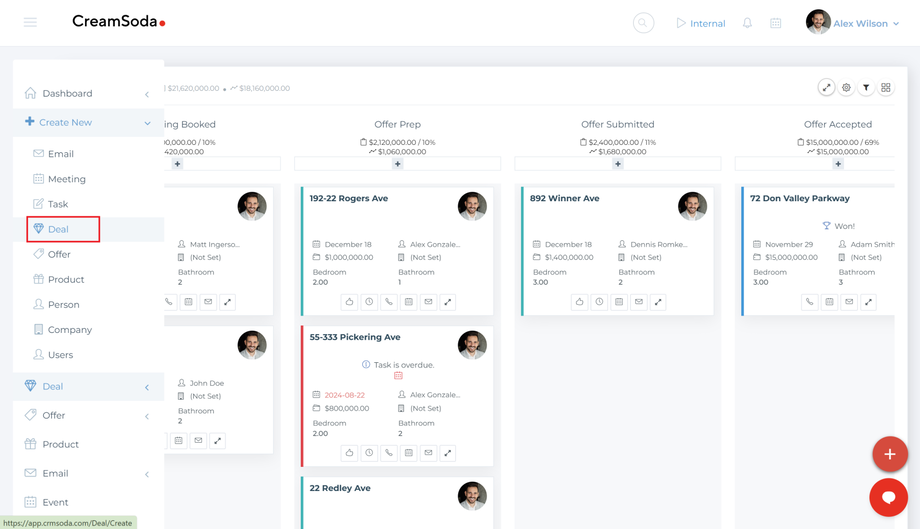
Left menu bar: Click “+ Create New” and select Deal.
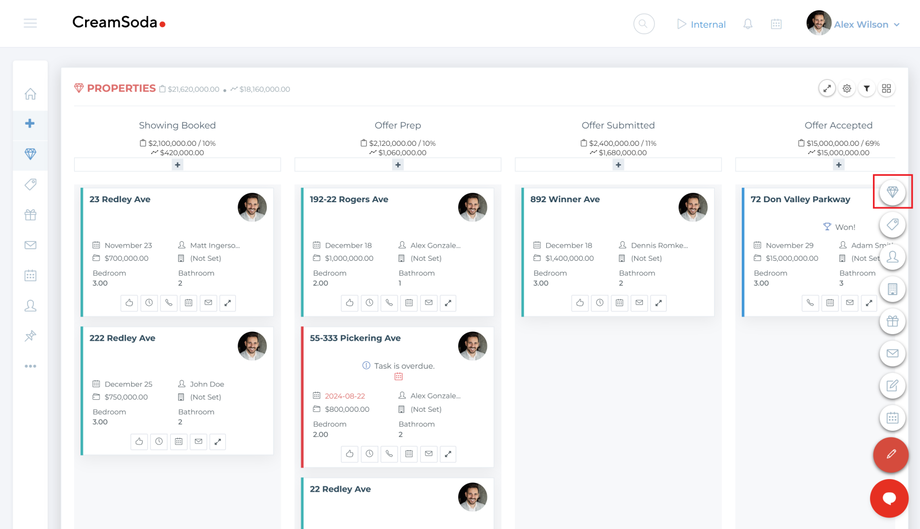
Quick Actions: Use the Quick Add "+" button.
Filling Out Deal Details
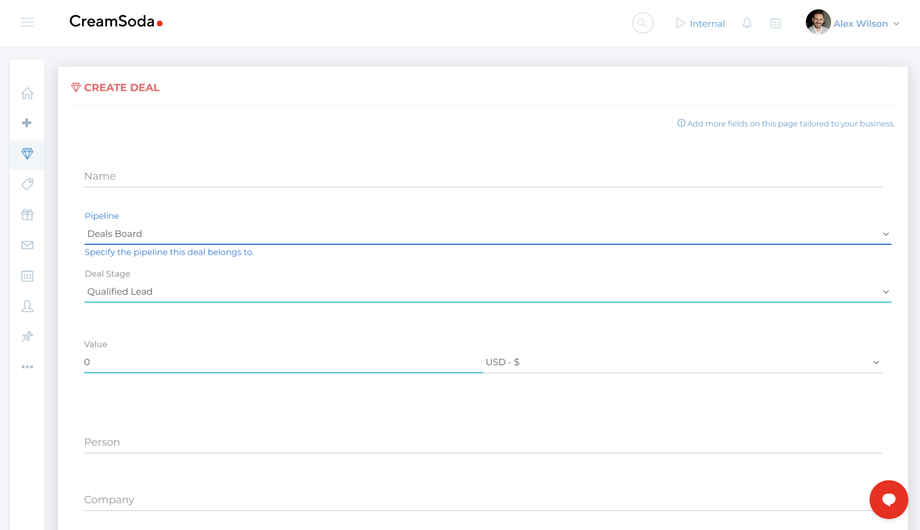
Once you’ve selected your preferred method for adding a Deal, fill in the following fields to provide all necessary details:
- Name: Give your Deal a title to help identify its purpose at a glance.
- Pipeline: Select a pipeline to visualize where this Deal sits in your sales process.
- Deal Stage: Assign a stage to the Deal, indicating its current position in the sales journey.
- Value: Enter an estimated amount for the Deal. You can select the currency type for accurate projections.
- Person: Link the Deal to an existing contact or quickly add a new one.
- Company: Associate the Deal with an existing Company or create a new one on the spot.
- Expected Close Date: Set a projected closing date to help with planning and forecasting.
- Offer Id: Select the offer you want to associate with this deal. Only available if you have access to offers.
- Deal Owner: Choose the team member responsible for this Deal.
Final Steps
When you’re done, just hit Create, and your Deal will be added to your pipeline, ready for tracking and management.


