Create Custom Fields
CreamSoda offers a flexible approach to managing your sales process. It comes equipped with default fields for your deals, contacts, products, and offers, but it also allows you to add custom fields tailored to your company’s unique needs.
Custom fields enable you to capture specific information, customize your data, and organize and filter based on these fields within CreamSoda.
Add a Custom Field
To add a custom field to a Person, Company, Deal, Offer, or Product, follow these steps. CreamSoda will display the custom fields in the same manner as it does for native fields:
- Navigate to the left menu bar and select More Options.
- Scroll down to find Custom Properties.
- Click on the Manage Custom Properties button.
- Find the Settings link for the resource you want to customize.
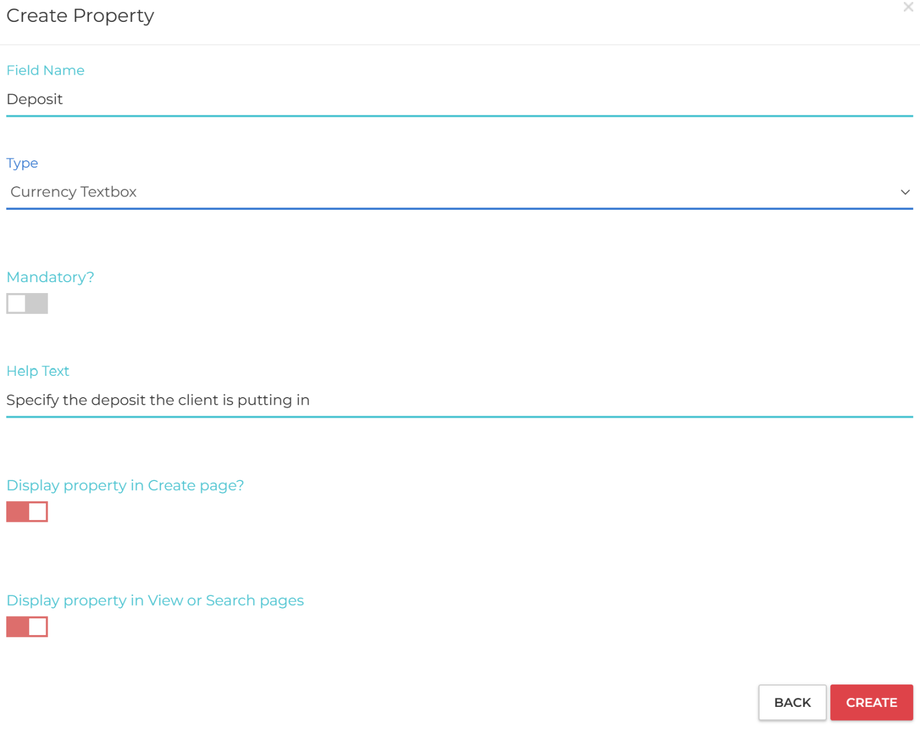
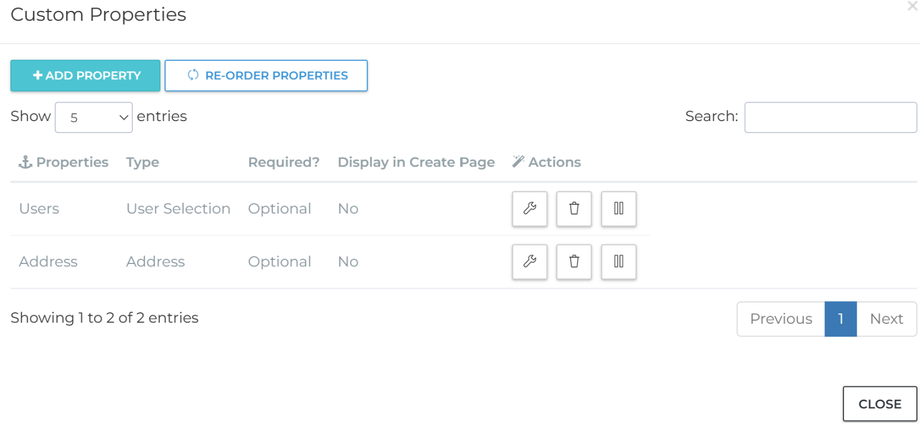
- When the custom properties modal appears, click on Add Property.
This will take you to the Create page for a custom property for your chosen resource.
CreamSoda provides you with the flexibility to create various types of custom properties as per your requirements.
| Field Type | Description | Usage |
| Single Line Text | Captures one-liner text | Short notes, URL, short one-liner comments |
| Paragraph Text | Used to note longer, paragraph text | multi-line comments, feedback, description |
| Auto-complete Textbox |
Captures structured information that changes over time and is not suitable for a single select list. Auto-complete list appears as you type based on previous data points you saved, just like Google Search. |
email addresses, tags |
| Number Textbox | Captures numerical values | decimal values, numbers, priority level, units requested, numbered ranking |
| Currency Textbox | Captures currencies with multiple currency options to choose from | Monetary values, commissions, estimates, costs |
| Single-select list | Captures structured data, where a user can only select one option | Category, industry, job title |
| Multi-select list | Captures structured data, where a user can select multiple options | Industry, region, competitors, job title, item status |
| Person selection |
Allows you to either select an existing Person resource or create a new one. Multiple Person resources can be added to a single field. Person selections are clickable and takes you to the relevant Person record. |
Vendor contact, secondary customer contact, Agent |
| Company selection |
Allows you to either select an existing Company resource or create a new one. Multiple Company resources can be added to a single field. Company selections are clickable and takes you to the relevant Company record.
|
Vendors, Agencies, Related companies |
| User selection |
Allows you to either select an existing user. Multiple users can be added to a single field |
Secondary contact owner, previous deal owner, Approver |
| Phone number |
Captures phone numbers |
Secondary phone numbers |
| Time |
Captures a time with am/pm |
Delivery time, lunch time |
| Time Range |
Captures a range of time |
Hours of operation, best time to contact |
| Date |
Captures a particular date |
deadlines, delivery date, next call date |
| Date Range |
Captures a range of date |
Event dates, completion estimates, holidays |
| Address |
Captures an address |
home address, business address, secondary locations |
While creating a custom property, you have the following options:
Mandatory - This option makes a property compulsory in edit forms. If you also select the “Display property in create page” option, it becomes a required field in creation forms as well.
Help Text - This feature lets you add explanatory text that users can read to understand the purpose of the field while filling it out.
Display property in create page - This option allows users to fill out this field when creating a new entry.
Display property in View or Search pages - This feature makes the field visible in all view and search pages, such as List View, Deal card, and Card View. It also enables you to perform searches on this field, including advanced searches
Editing an Existing Custom Field
To modify an existing custom field for a Person, Company, Deal, Offer, or Product, follow these steps:
- From the left menu bar, select More Options.
- Scroll down to Custom Properties.
- Click on the Manage Custom Properties button.
- Click the Settings link for your chosen resource.
- In the custom properties modal, select your desired field and click on the Edit button.
- This will open the Edit page for the selected custom property. Note that you cannot change the type of field once it’s created. If you need to change the type, you’ll need to disable the current field and create a new one.
Deleting or Deactivating a Custom Field
A custom field can only be deleted if it has never been used. If it’s already in use, it can only be deactivated. Deactivating a field hides it from all create, edit, view, and search pages. A deactivated field can be reactivated in the future.
To delete or deactivate a field:
- From the left menu bar, select More Options.
- Scroll down to Custom Properties.
- Click on the Manage Custom Properties button.
- Click the Settings link for your chosen resource.
- In the custom properties modal, select your desired field and click on the Pause button to deactivate a field.
- To delete a field, click on the Delete button.
Sorting Custom Fields
Sorting custom fields changes the order in which they are displayed in Create, edit, view, or search pages.
To sort custom fields:
- From the left menu bar, select More Options.
- Scroll down to Custom Properties.
- Click on the Manage Custom Properties button.
- Click the Settings link for your chosen resource.
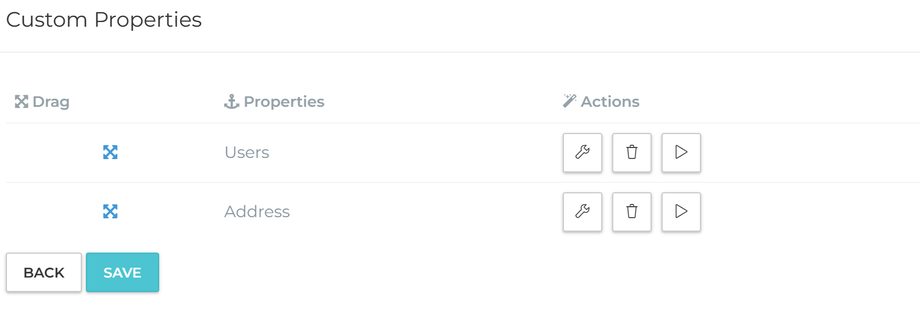
- In the custom properties modal, click on the Re-order Properties.
- Use the Drag icon to move a field up or down.
Other Ways to Access Custom Field Settings
Custom fields can also be accessed from a resource page. To do this:
- Select your desired resource, such as Person, Company, Deal, Offer, or Product, from the left menu bar.
- Click on your chosen record, such as a Person record.
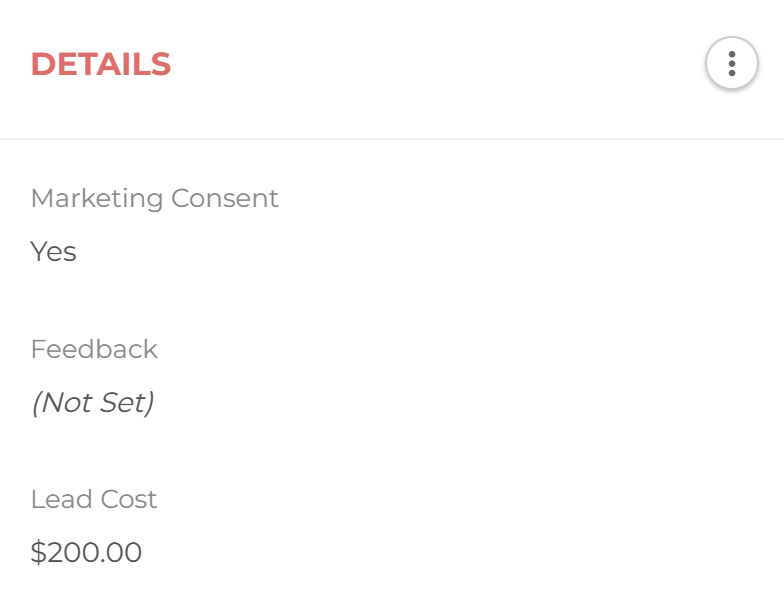
- Scroll down to the Details section.
- Click on the 3 dots and choose Property Settings from the menu option.
Viewing Custom Fields
Custom fields are displayed throughout CreamSoda in relevant places. To view all custom fields attached to a resource:
- Select your desired resource, such as Person, Company, Deal, Offer, or Product, from the left menu bar.
- Click on your chosen record, such as a Person record.
- Scroll down to the Details section.
Custom fields can also be imported using the Import data functionality.
Custom Fields in Lead Forms and Sequences
Custom fields can also be used in Lead Forms and Sequences. For more information, please refer to the relevant articles.


